Firebase Google authentication in React
How to sign-in with Firebase Google authentication in React

I am a frontend engineer with a passion for exploring new web technologies, I bring a vast knowledge of jQuery, JavaScript, React, Next, context API, and Redux to every project. With a keen eye for detail and a focus on delivering exceptional user experiences, it is my responsibility to code, style, and create reusable components that adhere to UI specifications. My goal is to help you bring your ideas to life, and I'm always eager to collaborate with others on new and exciting projects. Whether you're looking to create a sleek, modern website or a cutting-edge web application, I have the expertise and creativity to make it happen. If you're interested in learning more about me or discussing project ideas, please don't hesitate to reach out. I'm always looking to expand my network, and I would love to connect with you!
Among the many Firebase authentication methods, Firebase Google authentication is a great feature.
First, let's start by explaining what Firebase is.
Google Firebase is a Google-backed application development software that enables developers to develop iOS, Android, and Web apps. In addition, Firebase is an app development platform that helps you build and grow apps and games that users love, and it is backed by Google. Firebase offers quite a couple of services:
Firestore Database.
Authentication.
Analytics.
Realtime Database.
Cloud messaging and lots more...
Now let's get jump into it.
To get started, let's first set up our Firebase environment by visiting firebase.google.com and logging in with your Google account.

NB: You should have a screen that looks like this once you have successfully signed in.
Click on "Get Started" or "Go to Console" at the top right corner of your screen.

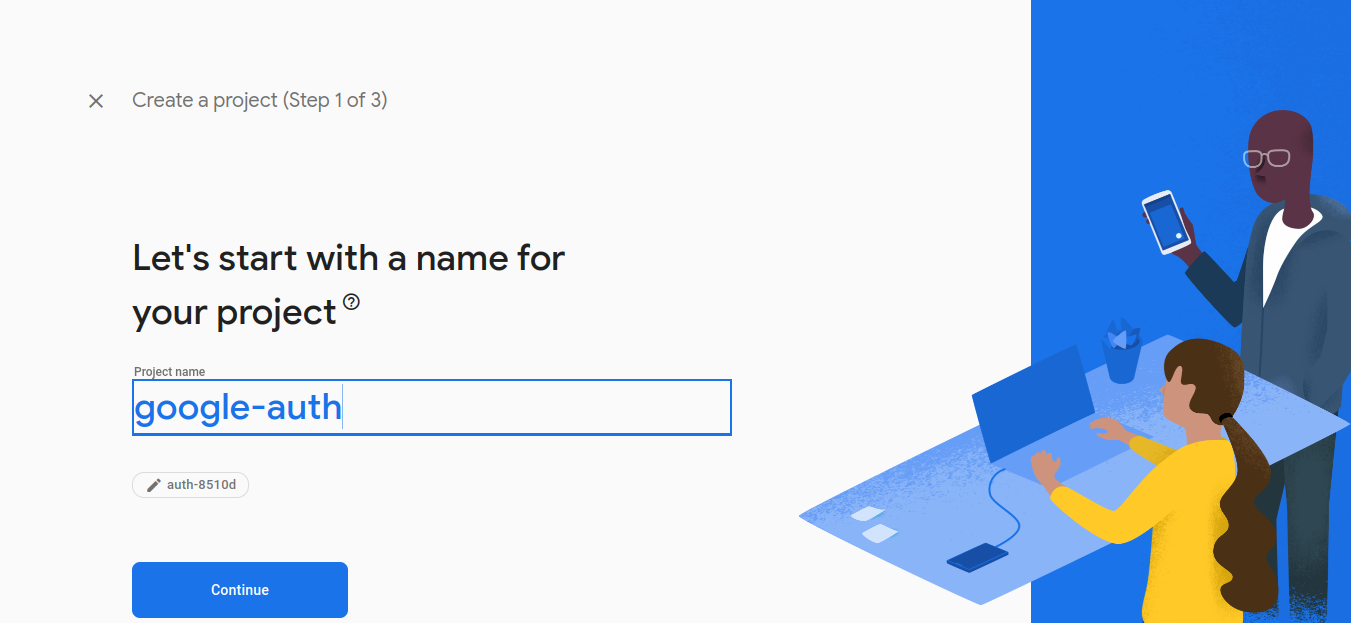
Click on the "Add Project" icon and give your project a name, in my case, I'll name our project google-auth.
Click on "continue," choose the default account for Firebase when you want to configure "Google Analytics," and then click on "create a project."

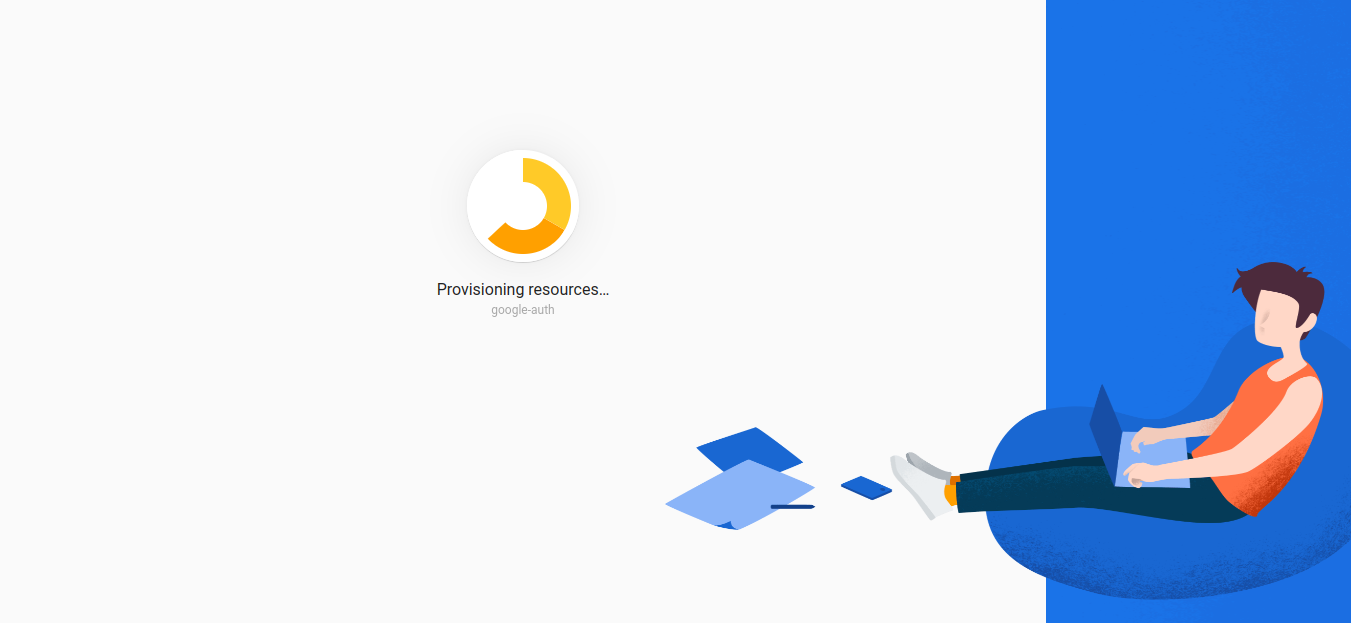
Then wait while Firebase configures your project. Once the configuration is complete click "continue" while you get redirected to the project dashboard
Once you see this screen, congratulations! You've created your first Firebase project.

Adding an App
Bear in mind that we can add different apps, such as Android, iOS, and web. For the sake of this article, we're working on a web-related app. To add an app, click on the web icon. It’ll allow us to create an app and give it a nickname.

After our app is successfully registered, a firebaseConfig will be available to help us initialize and connect with Firebase later.
Enabling Authentication
To enable authentication, let's go back to our project overview page and click on the authentication tab then click on "Get started".

Navigate to the sign-in method and select Google

After selecting Google, endeavor to enable Google and your project support email, which is the email address linked to your Firebase profile.
Congratulations 🎉, We have completed the first and most important part of our project. Let's go write some code.
Configuring our React Project
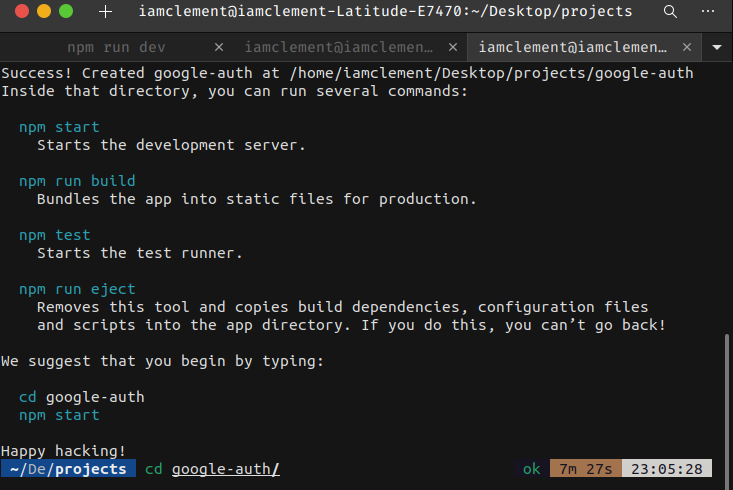
To begin with, let's create our starter project by using the following command line in our terminal.
npx create-create-app google-auth //google-auth is the name of my project, you can a preferred name.
The above code would create a react boilerplate for us. Now let's install Firebase to our project

Once the React boilerplate has been successfully created, navigate to our project with the following command.
cd google-auth //google-auth is the name of my project endeavor to replace it with the preferred name you chose for your project.
Type in the following command to install Firebase.
npm install firebase
Let's open our project in a code editor, you can make use of any code editor of your choice, but I'll be using vs code. Let's go ahead and create our firebase config file called "firebase.js" inside a service folder and add the below code.
Note: The service folder should be in the src folder created by React boilerplate.
src/services/firebase.js
import { getApp, getApps, initializeApp } from 'firebase/app';
import { getFirestore } from 'firebase/firestore';
import { getStorage } from 'firebase/storage';

//here is the firebase configuration
const firebaseConfig = {
    apiKey: "********************************",
    authDomain: "********************",
    projectId: "********",
    storageBucket: "***************",
    messagingSenderId: "************",
    appId: "*******************************************",
};

// replace the above firebaseConfig keys with the one provided by Firebase in your project setting.

//initialize firebase;
const app = getApps.length > 0 ? getApp() : initializeApp(firebaseConfig);

const firestore = getFirestore(app);

const storage = getStorage(app);

export { app, firestore, storage}
The above code snippet would initialize the app only if there is no other app; otherwise, the app will be initialized when there is a refresh. To avoid that, we check for the app length, and if it is greater than zero, the app information is fetched; otherwise, we initialize a new app.
Next, we'll create a login file component and type in the following code.
const Login = () => {

    //our login function would take place here.
    const LoginButton = () => {

    }


    return (
        <div>
            <button className="login__button" onClick={LoginButton}><i className="fab fa-google"></i>
                Login with Google
            </button>
        </div>
    )
}

export default Login
In order to sign in with Google, we need to import the getAuth, signInWithPopup, and GoogleAuthProvider from "firebase/auth," and then we need the app from our firebase file. Once we've imported it and initialized it, let's do that right away.
NB: Remember our firebase file is in the services folder; src/services/firebase.js
import { getAuth, signInWithPopup, GoogleAuthProvider } from 'firebase/auth';
import { app } from '../services/firebase';
import './login.css';

const Login = () => {

    const firebaseAuth = getAuth(app);
    const provider = new GoogleAuthProvider();
    const LoginButton = async () => {
        const response = await signInWithPopup(firebaseAuth, provider);
        console.log(response);
    }


    return (
        <div>
            <button className="login__button" onClick={LoginButton}><i className="fab fa-google"></i>
                Login with Google
            </button>
        </div>
    )
}

export default Login
Next, we'll create a folder with the name "context," and in this folder, we'll create some files and write the following code where our user information would be saved and can be called anytime it's needed in our project.
src/context/initialState.js
//define initial state of users
export const initialState = {
user : null,
}
The above code snippet is used to set the initial state of the user.
Next, let's create the reducer.js file.
src/context/reducer.js
export const actionType = {
    SET_USER: ' SET_USER',
}
//data layer
const reducer = (state, action) => {
    console.log(action);

    //when dispatching action type would be changed
    switch (action.type) {
        case actionType.SET_USER:
            return {
                ...state,
                user: action.user //update user action
            };
        default: return state;
    }
}

export default reducer;
src/context/StateContextProvider.jsx
//context information

import React, { createContext, useContext, useReducer } from "react";

export const StateContext = createContext();

//reducer and initial state context is being imported and the children is the component itself
export const StateProvider = ({ reducer, initialState, children }) => (
    <StateContext.Provider value={useReducer(reducer, initialState)}>
        {children}
    </StateContext.Provider>
);

export const useStateValue = () => useContext(StateContext);
Next, let us wrap our app with the StateProvider in the index.js file and add the initialState and reducer as props.
import React from 'react';
import ReactDOM from 'react-dom/client';
import './index.css';
import App from './App';
import {StateProvider} from './context/StateProvider'
import { initialState } from './context/initialState'
import reducer from './context/reducer'


const root = ReactDOM.createRoot(document.getElementById('root'));
root.render(
  <StateProvider initialState={ initialState } reducer={ reducer }>
    <App />
  </StateProvider>
);
Now, let's take a look at what we've done so far. Run your code with npm start
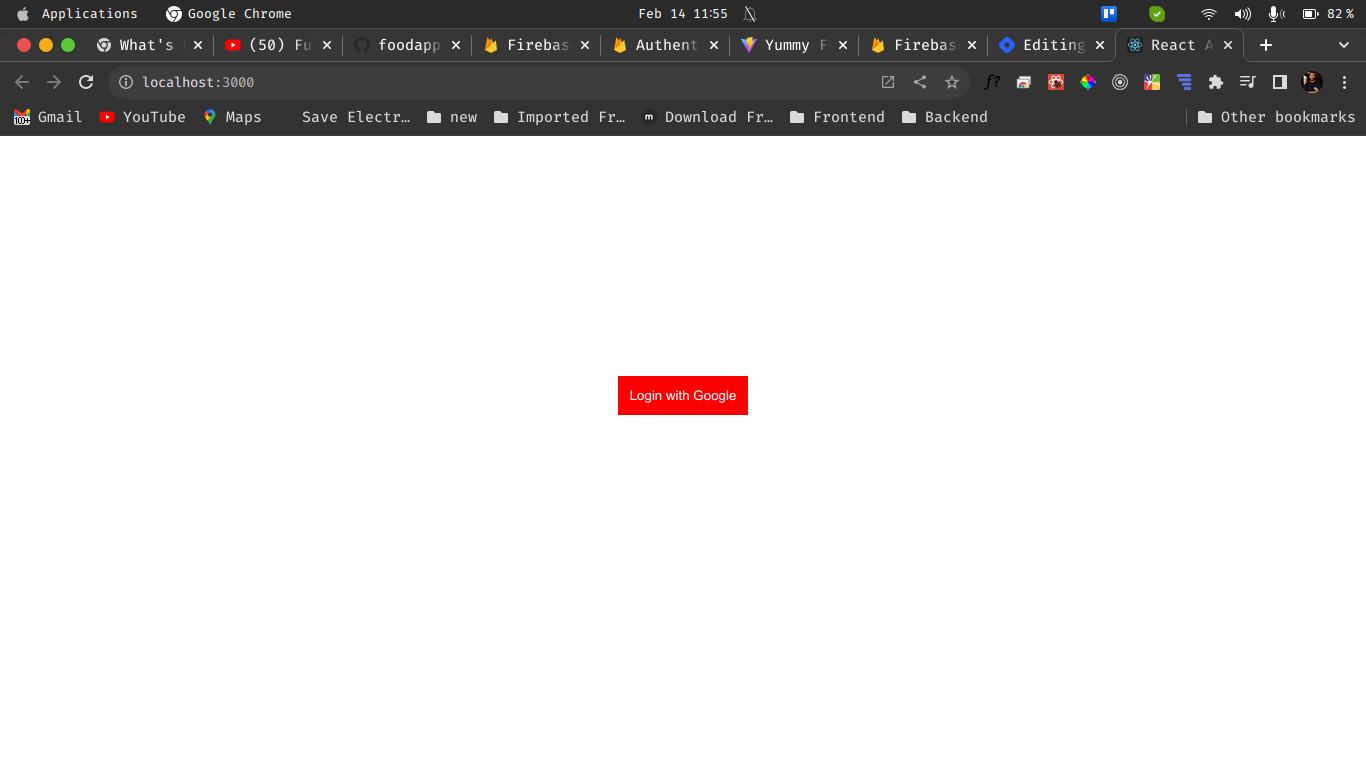
Here is what we have, click on the "Login with Google" button to sign in with Google

Good work! You'll notice we have a pop-up to choose an account to sign in with, I'll choose an account of my choice to sign in.
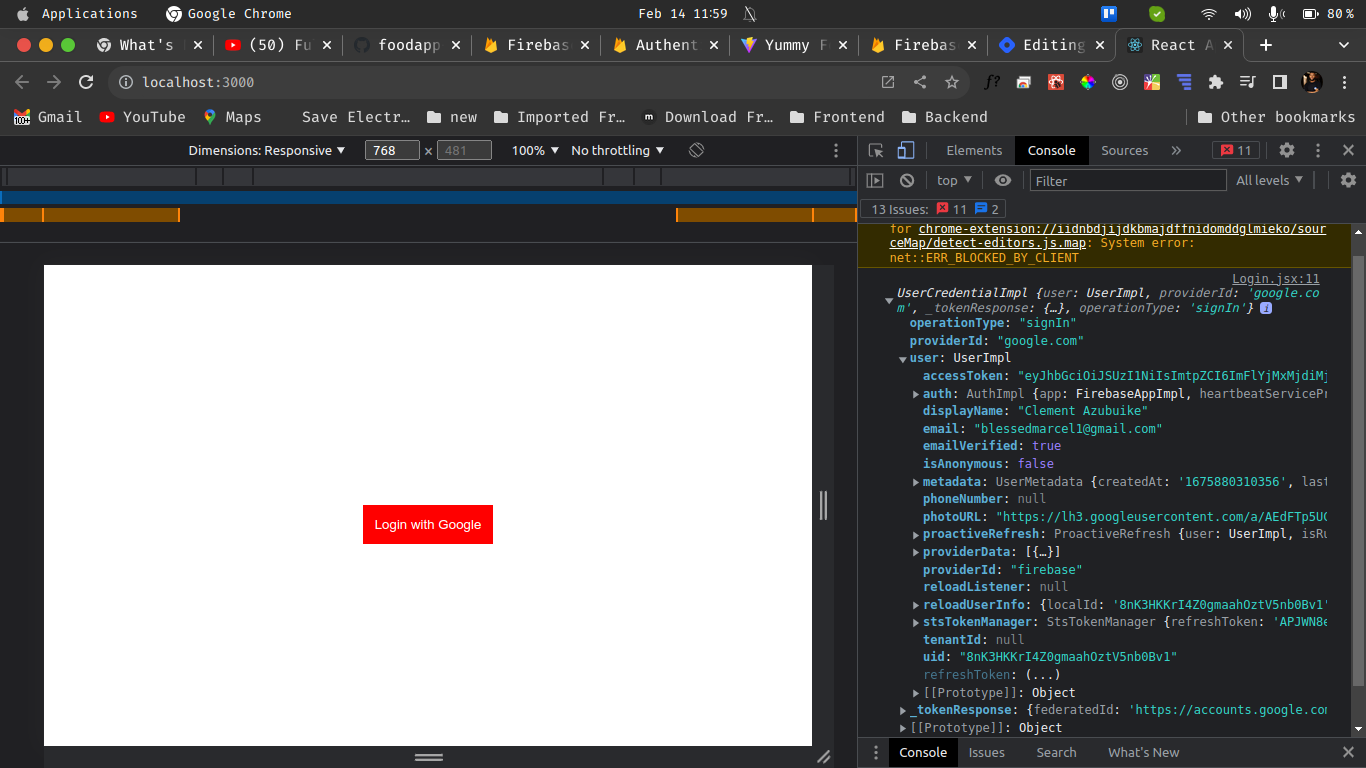
You'll notice on the right-hand side of my browser that there is a console page showing the user information. We're getting this information because we console log the entire response we're getting on the login page.
The next and final step is to dispatch and fetch the user's data and then display it. To achieve this, let us create a folder with the name "utils," and inside the folder, we'll create a file with the name "fetchUserData.js," and write the following code.
src/utils/fetchUserData.js
export const fetchUser = () => {
    const userInfo = localStorage.getItem('user') !== undefined ? JSON.parse(localStorage.getItem('user')) : localStorage.clearItem();


    return userInfo;
}
Next, let's import the user data into our context folder, where the file name is "initialState."
src/context/initialState.js
import { fetchUser } from "../utils/fetchUserData"

const userInfo = fetchUser();

export const initialState = {
    user: userInfo,
}
Next, let's dispatch the user data on the login page.
import { getAuth, signInWithPopup, GoogleAuthProvider } from 'firebase/auth';
import { app } from '../services/firebase';
import './login.css';
import { useStateValue } from '../context/StateProvider';
import { actionType } from '../context/reducer';

const Login = () => {

    const firebaseAuth = getAuth(app);
    const provider = new GoogleAuthProvider();

    const [ { user } , dispatch ] = useStateValue();
    const LoginButton = async () => {
        const { user : { refreshToken, providerData}} = await signInWithPopup(firebaseAuth, provider);
        //dispatch the data
        // we set the action type from the reducer hook so we call the action type object
        dispatch({
            type: actionType.SET_USER,
            user : providerData[0]
        })
    }


    return (
        <div>
            <button className="login__button" onClick={LoginButton}><i className="fab fa-google"></i>
                {
                    user ? user.displayName : 'Login with Google'
                }
            </button>
        </div>
    )
}

export default Login
The user was destructured to check if there is a logged-in user if a user is logged in the button text changes to the name found in the google account, otherwise, we have the text to be "Login with Google".
Together, we'll visit our browser and see what we have:

Select your email address.

Congratulations, we've been able to sign in with Firebase Google authentication.
I believe you find this helpful, kindly share and you can find the Git Repo Here
Thank you.